Here we guide you, how to install the latest version of android in your Sony Xperia M Dual C2004. These ROMs are generally for single SIM users. The dual SIM user should be flash with dual sim patch unless your cellular networks wont work. I couldn't feel any lag or crons, I think these roms are better than stock roms. I suggests everybody to install these rom.
The prerequisites are,
● Sony Xperia M Dual C2004/C2005
● Phone in rooted state
● Unlocked Bootloader
● Installation of recovery (TWRP 2.8.0.0 mostly recommended)
● Android 6.0.1 AOSP Custom Rom File by PecanCM
Rooting Your Sony Xperia M Dual:
Rooting your sony Xperia M Dual handset is not so tricky. You have one touch root application which can handle the rooting process itself and it is efficient too. It saves a lot of time for you. Just visit this site on your xperia device running android 4.3 (JB) and download the android package file(.apk) and install it and run it.Visit this page and click the lambda symbol to start downloading that application and then install it .
https://towelroot.com/
Once the app is installed . Open the app and press the button which says “Make it rain” (Make sure you are connected to the internet). It will take more or less 2 seconds and then you are free to go . Your phone is now rooted.
Unlocking Your Bootloader:
Unlocking your Sony Xperia’s Bootloader is slightly a tricky part . The tricky part is where we have to install the required drivers. Here we use fastboot option to unlock our bootloader. To unlock bootloader you need to get the bootloader unlocking code which is provided by the sony official website. Remember unlocking your bootloader voids your warranty.Google fastboot to know how to enter fastboot.
Follow the instructions given by the following link provided below:
http://developer.sonymobile.com/unlockbootloader/unlock-yourboot-loader/
in that webpage scroll to the end of the page . You will asked for your handset model number . Select it as Xperia M Dual . And after navigating to the next page you will be asked for your IMEI number . Don’t get confused use your Sim 1 IMEI number after which they will provide you the unlock code as well procedure on how to unlock the bootloader.
Installing your custom recovery:
It is very essential that you backup all your data in your phone before proceeding further .Also Make sure you have all the necessary files for the installation like Custom Rom File.
Because Proceeding further may brick your phone . And Don’t worry i can help to unbrick it too. Just install Sony PC companion and make sure your device is shown there before proceeding into installation of recovery.
Download TWRP 2.8.0.0 this particular version works like a charm for me and so i suggest you to install the same version so that i can help you troubleshoot in case if anything goes wrong.
TWRP 2.8.0.0 : https://www.dropbox.com/s/3xtpa40ej72y7u7/TWRP%202.8.0.0.img?dl=0
After downloading the recovery img file . Install Rashr app from play store.
Open Rashr
Select Recovery from storage
Browse for your TWRP 2.8.0.0 img file location
Select that file and select yes to flash that file.
If everything goes fine then your device will ask you to reboot. And if you reboot your device . It won’t boot into your Android 4.3.
While Rebooting when the Sony Logo is displayed you can see that your notification light glows in pink color. When its pink in color hold your volume up key to boot into the recovery.While booting into your recovery your notification light glows in cyan color.
Fastboot Method: You can also install custom recovery by fastboot method, but you need to google fastboot command and install ADB files and drivers in your PC.
Installing Android 7.1.1
You can download CyanogenMod Build Rom file : http://download.cyanogenmod.org/get/jenkins/189933/cm-14.1-20161225-NIGHTLY-nicki.zip
AOSP BETA 5 Nougat for Xperia M Rom file: https://www.mediafire.com/?ltwb5qgqd22ckfi
For dual sim users: Flash this patch get dual sim working https://www.mediafire.com/?aag77t1w7bi7gg0
And if you have the rom file in your external storage then follow the steps to boot into recovery(or you can use any software to boot into recovery).
Once you have entered into the recovery you need to follow the instructons given below.
Note: TWRP supports touch input.
● Select Wipe
● Do not go for advanced wipe
● Just Slide the “Swipe to Factory Reset” button
● Wait for it done and it will give a success message
● Now navigate to the home screen of the recovery by pressing the home key displayed at the bottom.
● Select Install
● Select the Storage where your ROM file is.(In our case it should be in Micro SDcard)
● Browse for your ROM file
● Select it, Select dual sim patch [For dual sim users] , [Select GAPP, If you want set up all at together]
● Slide the “Swipe to Confirm Flash” button
● Wait for Success Message
That is it. Your Xperia Device is now running Android 7.1.1 Nougat.
Note: First Boot will always take more time. Relax and leave your phone as you might have stressed out a lot.
For google apps you need install a separate package called Gapps. You can google that and find the procedure.The installation procedure for Gapps is same as the installation of ROM we did earlier.
Gapps: http://www.opengapps.org
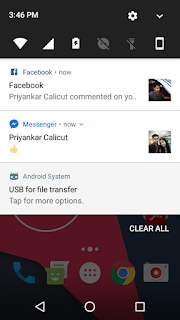
CyanogenMod Build Rom Screenshots:


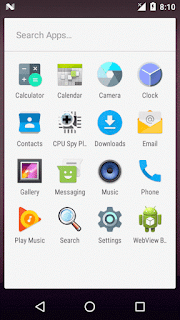
AOSP BETA 5 Rom Screenshots:


Contributors
AOSP BETA 5: PecanCM
CyanogenMod


Working fine. Thanks for share guideline with tips
ReplyDeleteGlad to welcome feedback :)
DeleteNote: The ROMS are Sngle sim versions, single sim users DO NOT flash dual sim patch.
ReplyDeleteDual sim users MUST BE flash dual sim patch, either your network will not work
can dual sim work simultaneously?
ReplyDeleteYes. But you need to flash dual sim patch
Delete